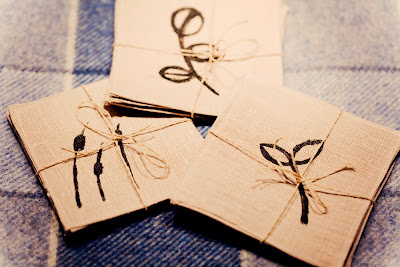
First up, here are the coasters I made for some dear friends of mine. Each set of 4 has a different botanical themed design.
Here's how I made them (instructions are for one set of 4 coasters):
1. First, I cut out 8 squares of my chosen linen fabric. Each square was 13.5cm on each side. After cutting the first one, I used this as a template for the others by pinning it down on the fabric and cutting around it.
2. With each square, I pressed seams of around 7mm all around, then chopped the corners that stuck out, so they wouldn't be bulky once sewn together.
3. I then sandwiched two squares (pressed seams together), pinned in place and sewed around, finishing with a backstich.
4. Once all coasters had been sewn, I painted on my designs using black fabric paint. To fix the paint, I covered the coaster (design side up) with a piece of cloth and ironed over it for a few minutes. Voila!
Variations: You could use the same technique with bigger rectangular pieces of fabric to make place-mats or double the coaster square size and add some wadding in between for a trivet. For the design, you could also have a go with stencilling or printing using potatoes or cut fruit. Alternatively, just stitch across the coaster with different stitches in a contrasting thread.


No comments:
Post a Comment